

Most Nextcloud remote deployments with cheap VPS have tight storage constraints. Adding block storage doesn’t come cheap and that’s where object storage really outshines since they are dirt cheap and provide high volume of storage.
This guide will go over how to integrate such object storage solutions like Wasabi, s3 object storage, storj with NextCloud.
Rclone. Install rclone on your machine using the following script.
1
sudo -v ; curl https://rclone.org/install.sh | sudo bash
Post install type rclone config to add a new remote.
1
2
3
4
5
6
7
8
9
10
11
12
13
14
15
16
17
18
19
20
21
22
23
24
25
26
27
28
29
30
31
32
33
34
35
36
37
Current remotes:

Name                 Type
====                 ====
backup               storj
onedrive             onedrive
onedrive-encrypt     crypt
storj                storj

e) Edit existing remote
n) New remote
d) Delete remote
r) Rename remote
c) Copy remote
s) Set configuration password
q) Quit config
e/n/d/r/c/s/q> n

Enter name for new remote.
name> wasabi

Option Storage.
Type of storage to configure.
Choose a number from below, or type in your own value.
 1 / 1Fichier
   \ (fichier)
 2 / Akamai NetStorage
   \ (netstorage)
 3 / Alias for an existing remote
   \ (alias)
 4 / Amazon Drive
   \ (amazon cloud drive)
 5 / Amazon S3 Compliant Storage Providers including AWS, Alibaba, Ceph, China Mobile, Cloudflare, ArvanCloud, DigitalOcean, Dreamhost, Huawei OBS, IBM COS, IDrive e2, IONOS Cloud, Liara, Lyve Cloud, Minio, Netease, RackCorp, Scaleway, SeaweedFS, StackPath, Storj, Tencent COS, Qiniu and Wasabi
   \ (s3)
   . . .
   . .
   .
You can visit rclone website to understand the different storage system and best defaults.
The config are stored under /home/user/.config/rclone.config
Next, you need to allow other users to mount on the system by uncommenting user_allow_other in /etc/fuse.conf.
At this point, if you want to check whether the configuration is correct you can mount the remote using the following command.
1
rclone mount remote-name: /mnt/mountpoint --vfs-cache-mode full
In order to make sure the remote is mounted at startup we will need to need to create a systemd file.
Create a file (for ex: rclone.service) at /etc/systemd/system and add the following in the file.
1
2
3
4
5
6
7
8
9
10
11
12
13
14
15
16
17
18
19
20
21
22
23
24
25
26
27
28
29
30
31
32
33
34
35
[Unit]
Description=RClone Service
Wants=network-online.target
After=network-online.target

[Service]
Type=notify
Environment=RCLONE_CONFIG=/home/user/.config/rclone/rclone.conf
KillMode=mixed
RestartSec=5
ExecStart=/usr/bin/rclone mount remote-name: /mnt/mountpoint \
--allow-other \
--allow-non-empty \
--vfs-cache-mode full \
--dir-cache-time 1h \
--dir-perms=770 \
--file-perms=0664 \
--uid=1000 \
--gid=1000 \
--rc \
--rc-no-auth \
--rc-addr 127.0.0.1:5572 \
--umask 002 \
--user-agent randomappname101 \
--cache-dir ~/.cache/ \
--vfs-cache-max-size 4G \
--vfs-cache-max-age 1h
ExecStop=/bin/fusermount -uz /mnt/mountpoint
ExecStartPost=/usr/bin/rclone rc vfs/refresh recursive=true --rc-addr 127.0.0.1:5572 _async=true
Restart=on-failure
User=user
Group=user

[Install]
WantedBy=multi-user.target
Important points before moving forward.
uid and gid value can be obtained by using id user. Executing the command should return something like following.
1
uid=1001(user) gid=1001(user) groups=1001(user),27(sudo),998(docker)
Make sure you have created the mountpoint and cache directory beforehand.
Once you make change to systemd unit file systemctl daemon-reload to reload the systemd manager configuration.
1
2
3
sudo systemctl start rclone.service # to execute the systemd unit
sudo systemctl enable rclone.service # sets the systemd unit to execute at restart
sudo journalctl -u rclone.service # check logs in case of error
In order to add the mount point you will need to enable “External Storage” in NextCloud Administrator console.
Add the Folder in the External Storage section.

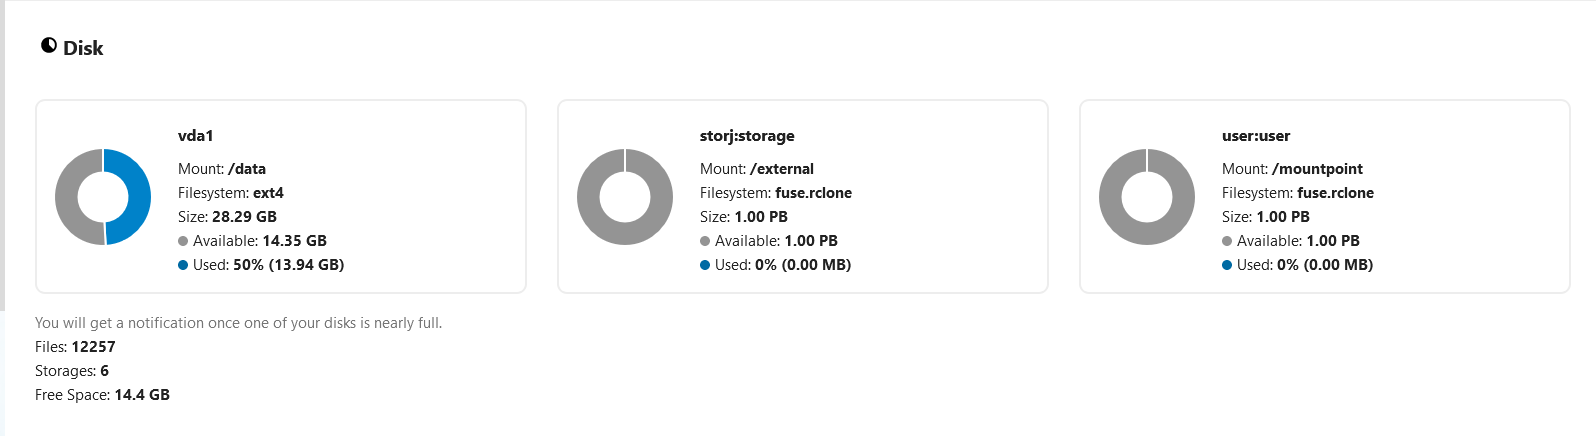
You can view the properties of the mounted storage system in System section.
The folder should now be available for use in the Nextcloud files pages.